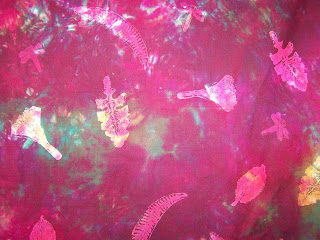
Sunday, December 26, 2010

New Year wishes

It is time for the new year. Time for new beginnings. Time to wash away the past and begin anew. 2010 was a very stressful year. I am tired. I can't tell you how tired I am. After rushing around on Christmas Eve trying to get those last minute items completed and running into too many obsticles, I just sort of gave in. Oh well! I said I guess that is not going to happen this year. At that time my word for the new year came to me.


RELAX


Yes. That is my word for the new year. Relax.

For quite a while, to many years really, I have felt rushed. Always playing catch-up. Over extending myself, over committing, eyes too big for the stomach, the whole 9 yards of that.  Even driving, I time travel to the latest minute, I try to sleep in to the last minute and then find that I am rushed to get where ever.

So, for 2011, I will relax. I could elaborate on all this with what I will or will not do to allow me to relax, but I think that that is all I will say. I will relax.

I looked back on my word for last year. Sensation. I will say I lived my year with many sensations. So this new year I hope to learn to relax.

My wonderful sister sent me Jamie Ridlers' Wishcrasting Journal for a Christmas gift. It is so appropriate for how I feel. I need to make life go right for me. I am tired of things going wrong. Maybe right and wrong are not the best words, maybe positive instead of negative would be better. I know that we all have what we can handle, but I would like to handle positive stuff. I have proved that I can handle the negative stuff. I want to be that person who people say, 'Wow! what a break for her, she deserves it after all that she has been through! Good for her!'

So the Wishcasting Journal is a way of asking for what I want to happen. It is just a variation on praying. Asking Spirit to help. Asking the universe for help. Self fulfilling prophacy.

2011 will be a great year.

My wish is that you have a great relaxing 2011 also.

Monday, November 1, 2010

Ok, so I had to do it again!


I had to do some more screen print. Since I only have the one thermofax screen it is the same, just a different color way.


Again I used a piece of fabric that I over dyed. You can see the original design in the picture below. It was cream base with a leaf pattern. This light aqua dye didn't cover the leaves as much as the other one. I let the screen go off the edge on to the cover fabric on the board that I use.


I used the flower screen and the 5 colors of paint. I let the paint dry between colors. It looks like the other piece from yesterday. I wash the screen after eash color. This time I was a little rough with it and ruined it after the last washing. So No more printing with this screen. I probably will buy it again. I have some ideas that I want to used on. I am really happy with both, this and the one from yesterday. I probably will make a bag or some sort. I think that the fabric will still look good when it is cut up.

Saturday, October 30, 2010

I Had to have some creative time

I just had to do something fun today. Amid the packing and storing stuff, I needed a break. So, I produced this.


I had taken a screen printing with thermofax screens class a couple of weekends ago and bought a screen and some paint from Lynn, the instructor. Check her out here. I went to Joann's and bought some more paint a couple of days later.


I just repeated the print with different colors paint. It was great fun and a great release to do something creative. It is also on a piece of my hand dyed fabric.


I let the prints dry between colors so it didn't have to worry about messing up what I had printed. I watched a new QA workshop that I got online today on screen printing while the printing dried.


Very nice workshop. I hope to apply a lot of her techniques to my work. I really enjoyed this. I also found her on YouTube and watched a couple of videos before I bought this one. I tried a couple to things that didn't work out. So I went back to what I know that worked. Discharge. I got out a stencil of a dragonfly and my Comet and a foam roller and went to town on a piece of my hand dyed.


I will probably add something else to it later. Paint stick rubbings or rubbings with stamps or maybe some more silk screen printing. This was fun also.


Saturday, October 23, 2010

New Clothes

With my new skills with discharge and paint sticks I took some old clothes and made them new.

First a Jean Skirt. First I have lost 30 lbs, so I fit into it again. Actually it is too big. What a problem to have huh! I have several stencils and used a nice large one on the front and then a small one in the lower left corner. I also put one on the bottom in the back by the slit. I put the stencil on the skirt and used a foam roller that I rolled in to Comet Gel with bleach. It is nice and thick. I rolled it over the stencil making sure I got all the parts and then let it sit for 10 minutes or so. I did the same with the others.


Then I tried a Jacket that was part of a summer dress outfit. The Jacket fits really nice now. So I did some discharge with stamps. I also used a variety of items, stamps and rubbing plates with the Shiva Paint Sticks.

Front

Back
It turned out really nice. Both items were great to wear and show off stuff that I have made.

Saturday, October 2, 2010

Shades of Blue


I tried a Navy study yesterday. I made 8 dye pots. Added Navy dye, 1/64, 1/32/ 1/16, 1/8, 1/4, 1/2, 1, 1 1/2 teaspoons of dye into the containers. I added 24 oz of water. I wanted them to be more solid and less mottled, so I made the mix larger. I added a 1/4 yard of cotton presoaked in a soda ash mix. I left them in the dye pots for 2 hours, just got busy doing other stuff.


Here are the 8 pieces still wet. I made a cut into each piece to help me remember the order because when they dry the colors will be different. One cut for the first color, 2 cuts for the 2nd one, etc.


 Then they are dry and folded. Nice shades of blue.

I plan on making a table runner with them. The lesson for this weeks online class is on graduated colors like this navy. So I am ahead of the game here. But more dying this week.

Friday, September 24, 2010

Best Present Ever


I got home from work today and found a box on my porch with the best Birthday present ever. It was full of the above things. A fat quarter bundle of 8 dark solids, A fat quarter bundle of 7 cute prints, A fat quarter bundle of 8 flannel solids, A fat quarter roll of 14 prints, 3 rubbing plates, and 7 quilting art workshop videos. WOW. Thanks Marianne. I will put all to good use.

I am off to the American Sewing Expo in Novi tomorrow. Pam, Sandy and I have signed up for a paint stick class, with Laura Murray. Two hours of rubbing on fabric. I am looking forward to it. Also the other great stuff that we get to look at during the show.  Great girls day.

Wednesday, September 15, 2010

Another Pillow

Another cute pillow from scraps. I have made a couple others with this same fabric. I have been able to practice my quilting. I am still just using straight quilting. I am using the Pfaff, it has a built in walking foot. I just did straight lines through the blocks and that made an X in each square.


The back is just angled lines. The pillow is roughly 15" square. I used a 16" pillow form. I have found that I need to make the pillow smaller than the form. Go Figure. But it works. I overlapped the backs about 3-4 inches. It turned out really nice.

Tuesday, September 14, 2010

Additions to the herd


This is the Current Herd. It was a Girls day last Saturday so went to the guild meeting and shopping afterwards.

I found additions to the herd. A Cute Ram, and a couple of alpaca's. 


Here they are out in the pasture. We do have room for 3 more animals. I will be on the lookout to add to the herd later.


Also found this cute mug.


And this Sheep to hang up by the studio door. I need to get a hanger.


Monday, September 13, 2010

I have sheep!!!!


Three Sheep. Yes - 3. Pam and I went in half's on them. The two white are females and the brown is a male. The former owner wanted to thin her flock. The females were $100 each and the Ram was $90. They are 1 year old. The brown and the white on the right are all Blue Face Leicester. The female on the left is 1/4 Wensleydale and 3/4 Blue Face Leicester.

We will be keeping them at Sandy's house with her sheep. The brown is a ram. Sandy will be able to mate them with her Cheviot and get a nice fleece. Long and lustrous.


This is the Wensleydale Blue Face mix.


This is Sofia, the Blue Face Leicester.


This is Barac, the Ram.

We be able to sheer them before the winter to get this years fleece. We will also be able to let them have babies in the spring.

We also got some chickens. I don't remember the variety. But there are 8. They will start laying eggs in the Spring.

Sunday, September 12, 2010

Dying Assignment


Our assignment was to make mountain colors, grass and greenery, rocks and landscape colors. So my results are the below.


I made grey, blue, green and brown. Each piece of fabric has two dyes on them, a light and a dark variation of the color. So each piece has a wide variation in the color intensity. And there is also the mottling effect of dying in the cups. I then added black to 3 of the color for darker variations. So the fabric colors are as follows. This picture is turned so the order is

  • brown with black

  • brown

  • green with black

  • green

  • blue with black

  • blue

  • gray


These are the dye colors that were used. You know that yellow and blue make green. Well the amount of yellow and the amount of blue determine what shade of green you end up with. Brown is made or red, yellow and blue. The red didn't dissolve very well and so there are specks of red all over the brown pieced. So since the red didn't dissolve then there was just the yellow and blue to dye the fabric so it has a green tinge.


Then I did some stuff on my own. These are the dyes that I used for some over dying. I took a piece of cotton that had a light green background and some green leaves printed on it. I used the following colors on some  1/2 yard pieces.


  • Pale Aqua

  • Raspberry

  • Warm black

  • Forest Green

  • Navy

  • Burgundy

  • Brilliant orange

  • Lilac
I didn't keep a piece of the original, but it looks a lot like the pale aqua piece. The leaves only are visible in a couple of the lighter dyes. Pale Aqua, Brilliant Orange, Burgundy and Lilac.


Here you can still see the original pattern of the leaves. You can see them in the aqua piece in the first picture and in the last fabric in the second picture.

Friday, September 10, 2010

New supplies


The small Measuring spoons that I ordered finally arrived - cute names.


Got some more paints at Dick Blicks


Some Stickers and stencils from Joann's and Hobby Lobby.


A small brayer and mask Ease from Dick Blick and Hobby lobby.

Can't wait till more fabric fun this weekend.

Saturday, September 4, 2010

Ok, I am having just too much fun...


I started last night with this fabric below.

I added some rubbings with Shiva Sticks on some rubber stamps and rubbing plates.


This morning I added some more stamping but I used a Comet gel as a discharge.  The large leafy cross in the pictures are the discharge. I also used a scrub brush and dipped it in the comet gel and then stamped it onto the fabric moving it slightly to make an impression.


I took another piece and rolled the gel onto a variety of leaf stamps. You have to time the discharge for how long to leave it on the fabric. It is rinsed well and soaked in a water and anti clorine solution for a while.


Next, I went into the garage to get something from the fridge and saw some noodles for the water so I cut off a couple of pieces a couple of inches long and used them as stamps for the following piece. I did an overall pattern on the 1/2 yard. Below is the piece of noodle and the fabric before I washed it.


Here is the piece after I washed and dryed it. Oh, so cool.


Then I took a plastic grid that I bought at the dollar store today and made another overall pattern with the discharge gel. I laid the grid on and used a roller to get the gel into the grid and on the fabric. It took a while to get the entire 1/2 yard covered, I ended up washing the bottom while the top was still working on the fabric. This really looks great.


With each piece of fabric the I took from my stash I had fun dedicing what to do with it. I hope to add more stuff to some pieces. The following looked like the it needed some fish swimming, so I found some fish stamps and used some paint and a brayer to get the paint on the stamp.


It is hard to see the fish . So I will add more stamps or rubbings later.


Next piece I used a Clorox Bleach pen and just did some squiggles. Timing was critical here also. The first part gets too bleached while the last part still needs work.


Some more with the bleach pen on a blue piece.

I ran out of bleach pen so I put the Clorox gel into a squeeze bottle and did some more squiggles.


The work area is so great. I have everything there at hand. Except when I have to run down stairs to get some other stamps or more fabric. But then I get some exercise too!

I went to the dollar store and bought some items to used as stamps or rubbings, You learn to look at items differently when you want to used them on the fabric. I bought a neat cutting board that has a little handle and lip that I have been using as a palatte for the discharge gel. I also used a piece of glass to pour the paint on when I used the brayer. The grid that I used above is some sort of mat.